Navigation
 Clipboard Filter
Clipboard Filter allows you to show tasks in the exact order you view them from emails, status files and really any source you can think of. It uses the data from a copy/cut function from another application to list the tasks in MS Project.
Let's say I receive the following email.
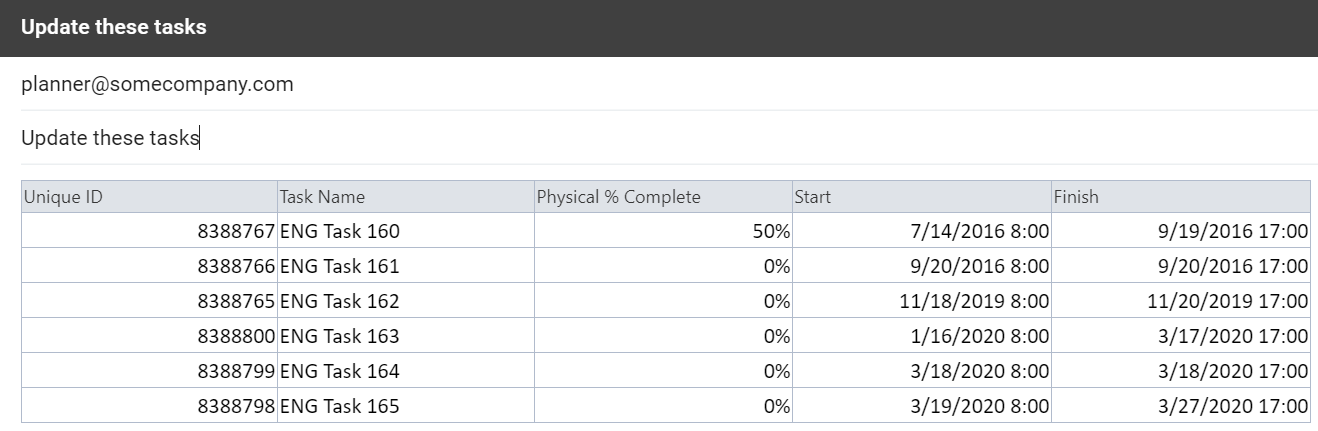
To see these tasks in the exact order of the email, copy Column 1. After copying the data click Clipboard Filter in the ItMakesSense ribbon menu. This will flag the task and order the data in the order it was copied. The number used for this "flag" is defined in Application Settings.
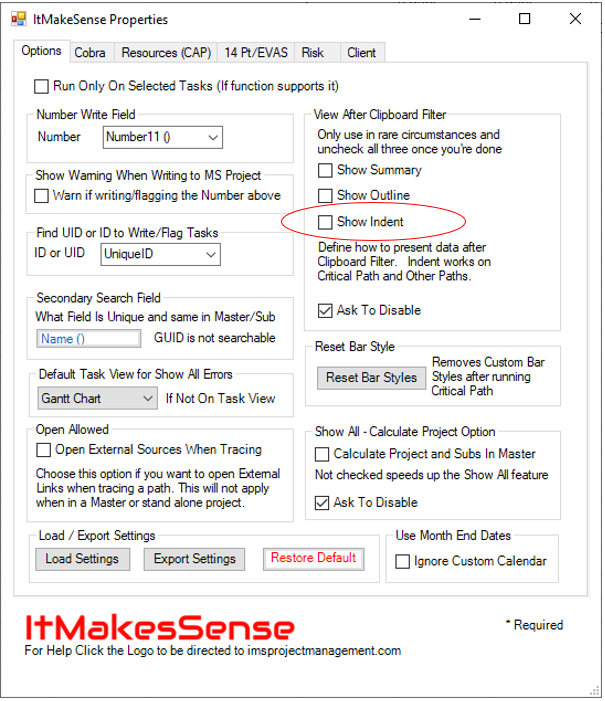
Clipboard Filter will remove the task name indent, show all outline levels, and remove summaries unless you have disabled one or more of these options in Application Settings. Now, what you see in MS Project is identical to what you see in the table. If there was an action required from this email, let's say update the Percent Complete, you can copy and paste the data.

 Show All
Show All removes filters, displays all outline levels, displays summaries and applies the name indent all at once. There are several advantages to this but the most important one is time. I think most people who use MS Project would agree that too much time is wasted on returning the view to find information or show everything. Often times you're in a schedule review meeting and several people are watching you click ~10 times just to find a task. What's really embarrassing is when you can't find a task you know is there because you missed a step. Show All, combined with bookmarks and other find features drastically cut down the anxiety and processing time it takes to navigate MS Project in high pressure situations. Show All also remembers where you were at and attempts to activate the task you were on before you clicked it.
Most, if not all, functions in this application that write to the defined Number field attempt to put MS Project data in a spreadsheet like format. One action that might drive you crazy is that these functions remove indents. This is by design. Show All and the quick setting check box Indent Task Names are available in the ItMakesSense menu to return to the outline view you're used to. If you do not ever want the application to remove indents you can disable it by selecting Show Indents on the Options tab of Application Settings. If this is a permanent change, make sure that Ask To Disable is not checked.
 Find UID
Find UID works just like the Find function in Project except you don't have to do the setup that it requires. (Select UniqueID, make sure equals is selected) This becomes a hassle when you switch between different search's regularly. Find UID only cares about Unique ID so it saves you a lot of time over the course of a project.
Find Other
Find Other allows you to select another field to find exclusively each time. This field is also used by Path Tracker and the Classic Trace to locate tasks by right clicking. This is important in a Master because the Subproject Unique ID can be repeated in multiple Subs. Create a field with a formula such as [Project]&[Unique ID] to make it Master Unique.
 Bookmarks
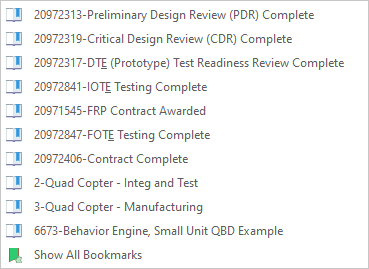
You can set up to 10 bookmarks in order to return back to at a later time. There's also an option to show all bookmarks at once. Bookmarks are dynamically changed in the menu as you set them with the UID and Task Name.
 Scratch Pad
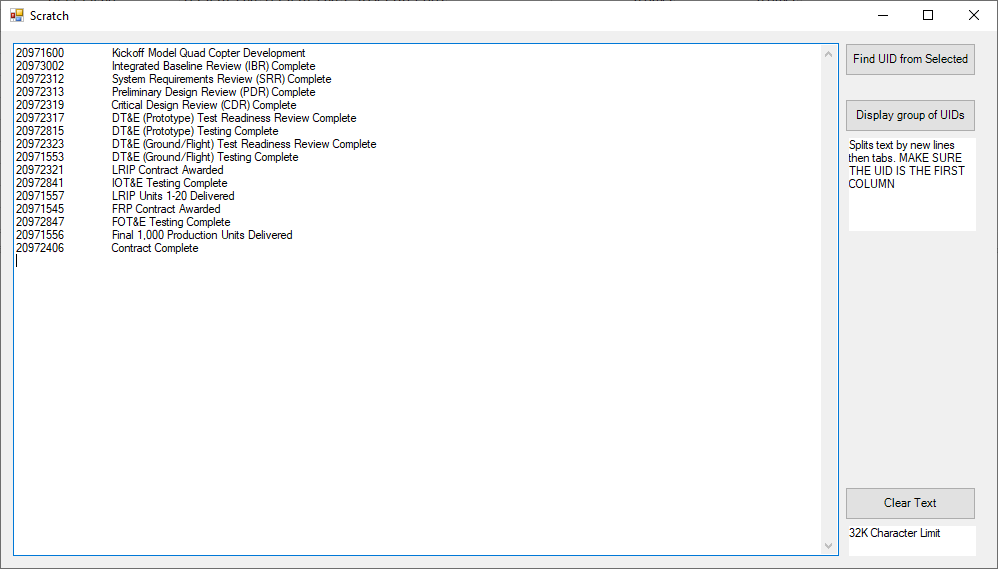
Notes, per configuration can be entered here. Ideally, you would copy and paste a group of tasks you want to return to, similar to bookmarks. Make sure the first column you copy and paste is UID and you can use 'Display Group of UIDs'. Alternatively, if you just want to navigate to one of them, choose Find UID from Selected after highlighting any UID.
Quick Setting - Remove Filters before find
Under App Settings there is a check box that will run the Show All utility before the tool attempts to find a UID, Bookmark or other task. This is useful if you know the task is not visible in the current view. You can accomplish the same thing by clicking Show All before you try a find function. It takes a couple more seconds but you don't have to worry about not finding a task if it is in your schedule due to a hidden filter or a collapsed level.
Tutorials
Coming soon
- Use Clipboard Filter to Show Summaries
- Calculate Subprojects in the Master with Show All
Frequently Asked Questions
Coming soon